Chapter IV. Some Networked Double Weave Designs, Using Peg Plans
A. Some 8 Shaft Window Designs using Peg Plans
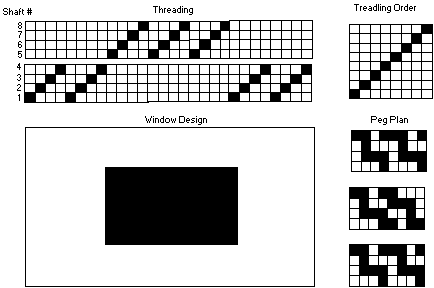
With a dobby loom, peg plans can be used rather than tieups (this method is sometimes called "single ties controlling multiple treadles"). Compare this diagram with figure 1 in chapter III.
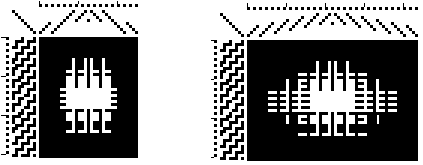
Figure I. The Windows Design in Double Weave using Peg Plans
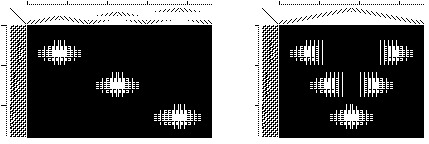
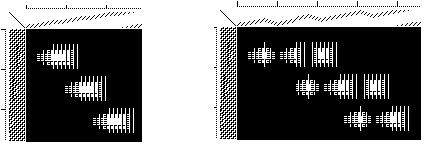
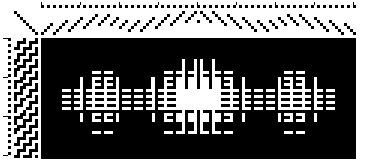
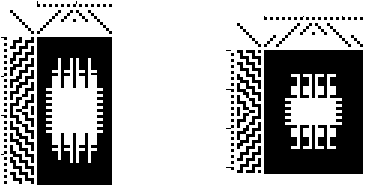
Figure 2 presents a series of diagrams beginning with a traditional double weave window design, adding transitions in the threading, the peg plan, and then both the threading and the peg plan. Diagram E extends the transition in the threading to show how changes can easily be made. The figures have a more curved appearance with this system than was true for tieups.
Figure 2. Some 8 shaft Window Designs
A. Traditional Double Weave B. Transition in Threading Only
C. Transition in Peg Plan Only D. Transition in Threading and Peg Plan
E. Extended Transition in the Threading Same Transition in the Peg Plan
All of the examples are symmetrical in the horizontal direction. It is as easy to make the designs symmetrical in the vertical direction when using peg plans as was true in the system that used tieups. Here is how to do it. Choose the point where you want the design to become vertically symmetrical. Now simply reverse the entire peg plan back to the beginning. This is shown in figure 3 for the two peg plans at this reflection point.
Figure 3. Reversal of the Peg Plan to Achieve Vertical Symmetry
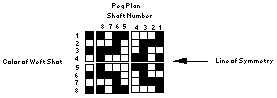
The peg bars for the fourth and the fifth weft shots are the same, a weaving error in the top layer. Moreover the third and sixth weft shots are the same, a weaving error in the bottom layer.
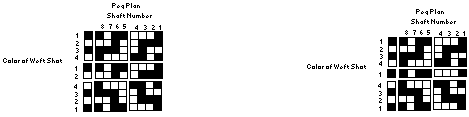
In Chapter II section II, the methods to achieve horizontal and vertical symmetry were discussed. To achieve horizontal symmetry, two additional warp threads must be added before reversing the threading and to achieve vertical symmetry, two additional peg bars must be added before reversing the order of the peg plan. The peg plan in figure 3 then becomes the peg order shown in figure 4. Both the warp and the weft color order must be changed from DLDL to LDLD at the reverse point.
Figure 4. Vertical Symmetry in the Weaving and in the Computer Graphics
For diagrams 5,6, and 7 it is important to recognize that the threading has only a single warp thread at the turning point and that the weft shots have only a single extra weft shot at the turning point. This avoids computer artifacts in the printouts.
Figure 5. Diagrams 2C and 2D made Vertically Symmetrical
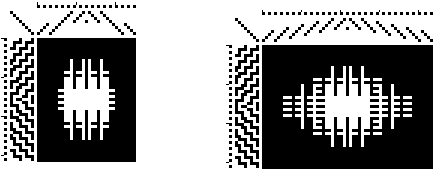
Figure 6 shows that 2C can be made symmetrical in two ways. The weft color order must change to LDLD for the second diagram.
Figure 6. Diagram 2C made Symmetrical in Two Different Ways
C. Some 12 and 16 Shaft Window Designs.
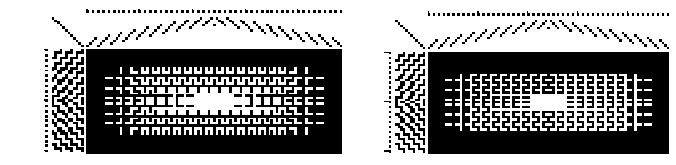
It is easy to extend the ideas presented for 8 shaft weaves to more shafts. Some computer printouts are shown on the next pages. The 12 shaft designs in figure 7 might be thought of as "windows within windows" and all show vertical symmetry.
Figure 7. 12 Shaft Networked Designs
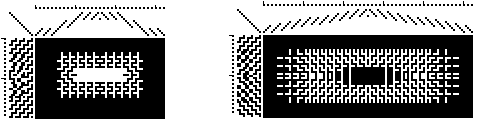
The second and third use the same motifs, with slight differences in placement. The 16 shaft designs in figure 8 illustrate how window motifs can be arranged in a variety of ways with some symmetrical and others asymmetrical.
Figure 8. Some 16 Shaft Networked Designs