This is a “winterize the RV” reminder post for me, and a “how to” post for you.
There are lots of articles out on the ‘net that talk about winterizing an RV. Most of them are repeats of the same article and, while the approach will work, it’s a lot harder than it needs to be. I learned this approach from the old codger that was minding the RV portion of WalMart when I went in to buy anti-freeze and a few parts. I was after a fitting to hook my air compressor up to the city-water inlet — he talked me out of that approach and told me this one instead. So I thought I’d share it.
Conventional approach;
– Blow out the water in all your plumbing with compressed air (requires a special fitting, and great care not to over pressurize your lines with the air compressor — no more than 25 psi por favor)
– Use the water pump to suck antifreeze out of the jug, either by disconnecting the line to the fresh water tank or by installing a T-valve that allows you to do this without disconnecting. Either way is a hassle, involving plumbing changes.
Old Codger Approach;
– Drain all the tanks.
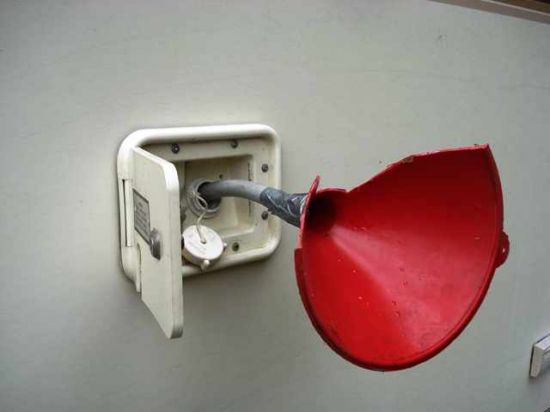
– Put anti-freeze in the fresh water tank (using the sophisticated device in the picture below)
– Use the water pump to distribute the anti-freeze, without messing about with your plumbing
It worked great — took about 5 gallons of anti-freeze, but I was being liberal in my use since WalMart had it on sale for 2 bucks a jug. It took about 3 gallons to prime the water pump.
Here are pictures of the various bits, and after that is a detailed checklist (mostly so I remember what I did)
Picture 1 — Sophisticated device to insert anti-freeze into fresh water system.
The funnel is all chopped up because I also use it to change the oil in the PowerTrac and it needs to fit into a really tight space. I may splurge and buy a new funnel.
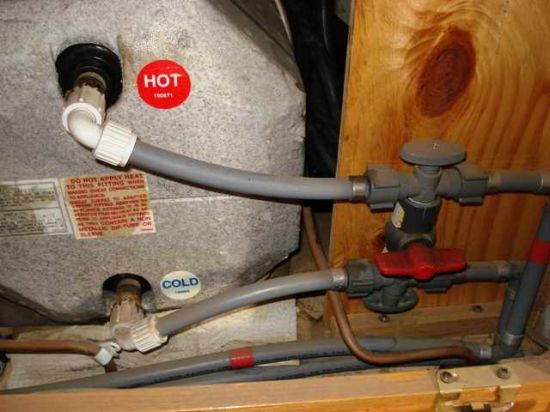
Picture 2 — Hot Water Bypass
These valves on my RV are configured in the “normal” position in this photo. So water is supplied to the hot water tank from the fresh water supply, fills up the tank and the exits as hot water to the faucets. Turning all three valves 90 degrees bypasses the hot water tank (meaning that you don’t have to fill the water tank with anti-freeze before anti-freeze gets to the faucets). I let some anti-freeze go into the (previously drained) water tank before I bypassed it.
Picture 3 — The drain plug on the hot water tank
Just a reminder — drain the water tank, put the plug back in, put some anti-freeze in there.
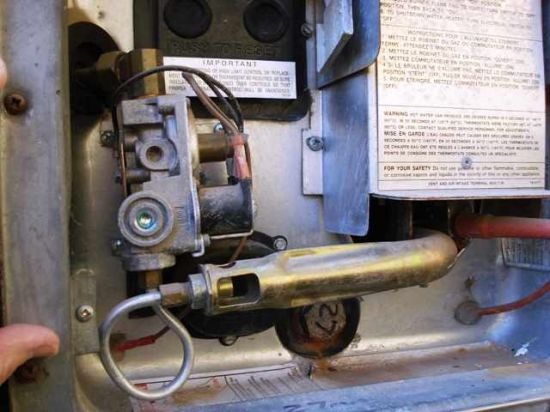
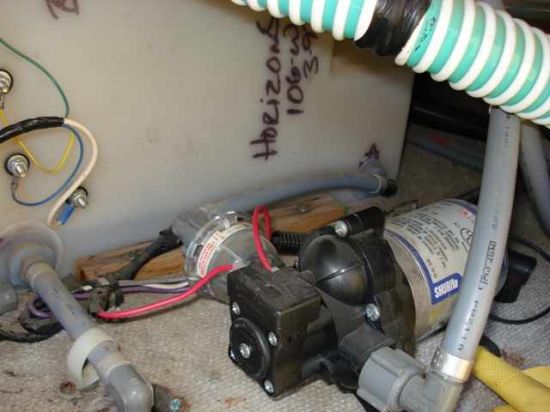
Photo 4 — Water pump
See the connection between the water pump and the fresh water tank right behind it? That’s the one that I’d have to mess around with if I used the Traditional approach to all this. Some people would have you cut that short line, insert a T-valve that chooses between the fresh water tank and a hose that runs down to the anti-freeze jug. What a hassle. What a huge opportunity to introduce leaky joints in your plumbing system.
Checklist;
Ok, here’s the step by step (so I remember next time).
Winterizing
– Drain everything (fresh water, hot water, gray water, black water) and then close them back up
– Pour 4 gallons of anti-freeze into fresh water tank
– Bypass hot water heater
– Turn on water pump
– Open faucets and toilet until they run pink (anti-freeze is pink)
– Drain gray and black water tanks again (probably don’t need to do this, but there’s a mix of fresh water and anti-freeze in there right now)
– Run some more anti-freeze into black water tank through toilet
– Run some more anti-freeze into gray water tank by pouring some into each trap
– Turn off the water pump for a second
– Un-bypass the hot water heater
– Fire up the water pump and let it put some anti-freeze in the hot water tank
– Turn off the water pump
Undoing the winterizing
should go something like this;
– Flush the anti-freeze out of the fresh water tank and, when the time seems right, shut off the drain valve and let fresh water accumulate in the tank — I dunno maybe 10 – 15 gallons
– Bypass the hot water heater
– Fire up the water pump
– Run all the taps and toilet until they don’t run pink any more
– Shut off the water pump
– Open the drain on the hot water heater, un-bypass it, fire up the water pump again, flush the anti-freeze out, shut off the water pump, re-install the drain plug, fire up the water pump and fill the water heater with fresh water (hot water taps should be open — they’ll start supplying water when the water heater is full).
Should be good to go at this point — I don’t see any reason to dump the gray and black water tanks, although I spoze you could as the last step. They’ll keep until the first time we’re at a dump station, at that point we can dump out the anti-freeze and fresh water that’s sloshing around in there.
Update — some months later (January, 2008)
All right! It worked! I just got back from a trip to Florida and can report that the plumbing worked fine after going through the “undo” checklist.
I can also report that this method sorta saved our bacon on the way back. As we left 85-degree Florida, a huge cold snap rumbled through the Midwest and we realized it was going to be below freezing by the time we finished driving on the first day back (in Georgia!). So in the mid-afternoon we pulled into an RV park, paid their $20 dumping fee, and did the “winterize” checklist before heading on up into frozen territory. The nice thing about this approach is that you can do it without any tools, unlike the traditional approach.
So we’re all winterized again (which is good, ’cause the night we got back it hit 15 below) and looking forward to our next trip south.


